Create a ReBAC Policy
Configure and enforce a Relationship-Based Access Control (ReBAC) policy in the Permit dashboard, step by step.
Defining our ReBAC Policy - Schema
In this guide, we'll set up ReBAC permissions for a dashboarding system with two resource types: Dashboards (parent) and
Widgets (child). Users can have the roles Owner, Viewer, or Analyst/Editor, each with its own permissions.
Access to a Dashboard automatically includes permissions on its Widgets.
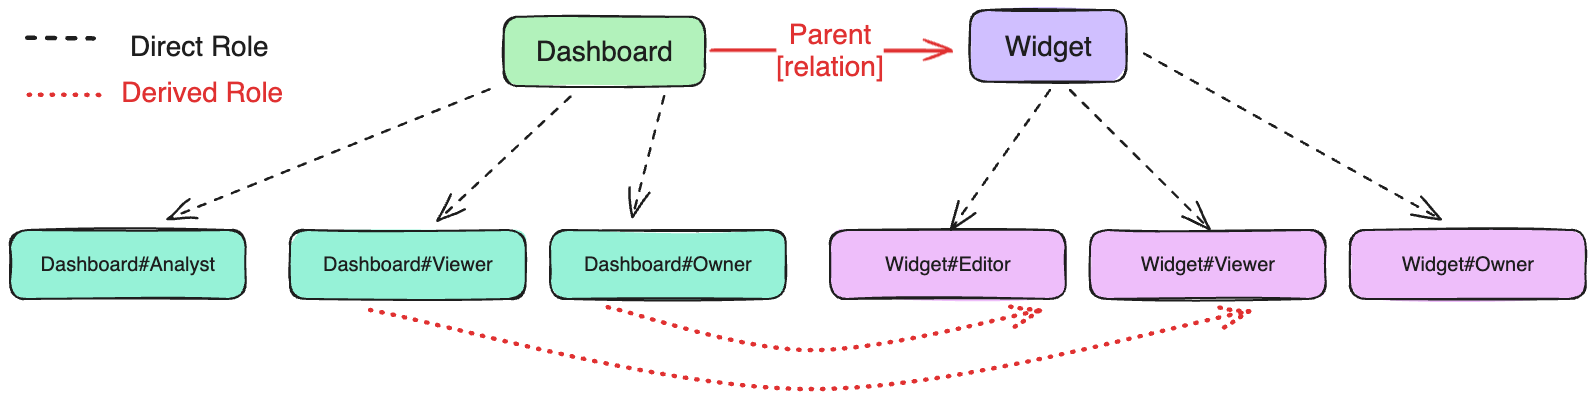
Start the ReBAC policy schema by defining two resources, Dashboard and Widget, each with its own actions and resource roles.
Step 1: Create Resources and their Roles
In the Permit dashboard, go to Policy > Resources and click Add Resource.
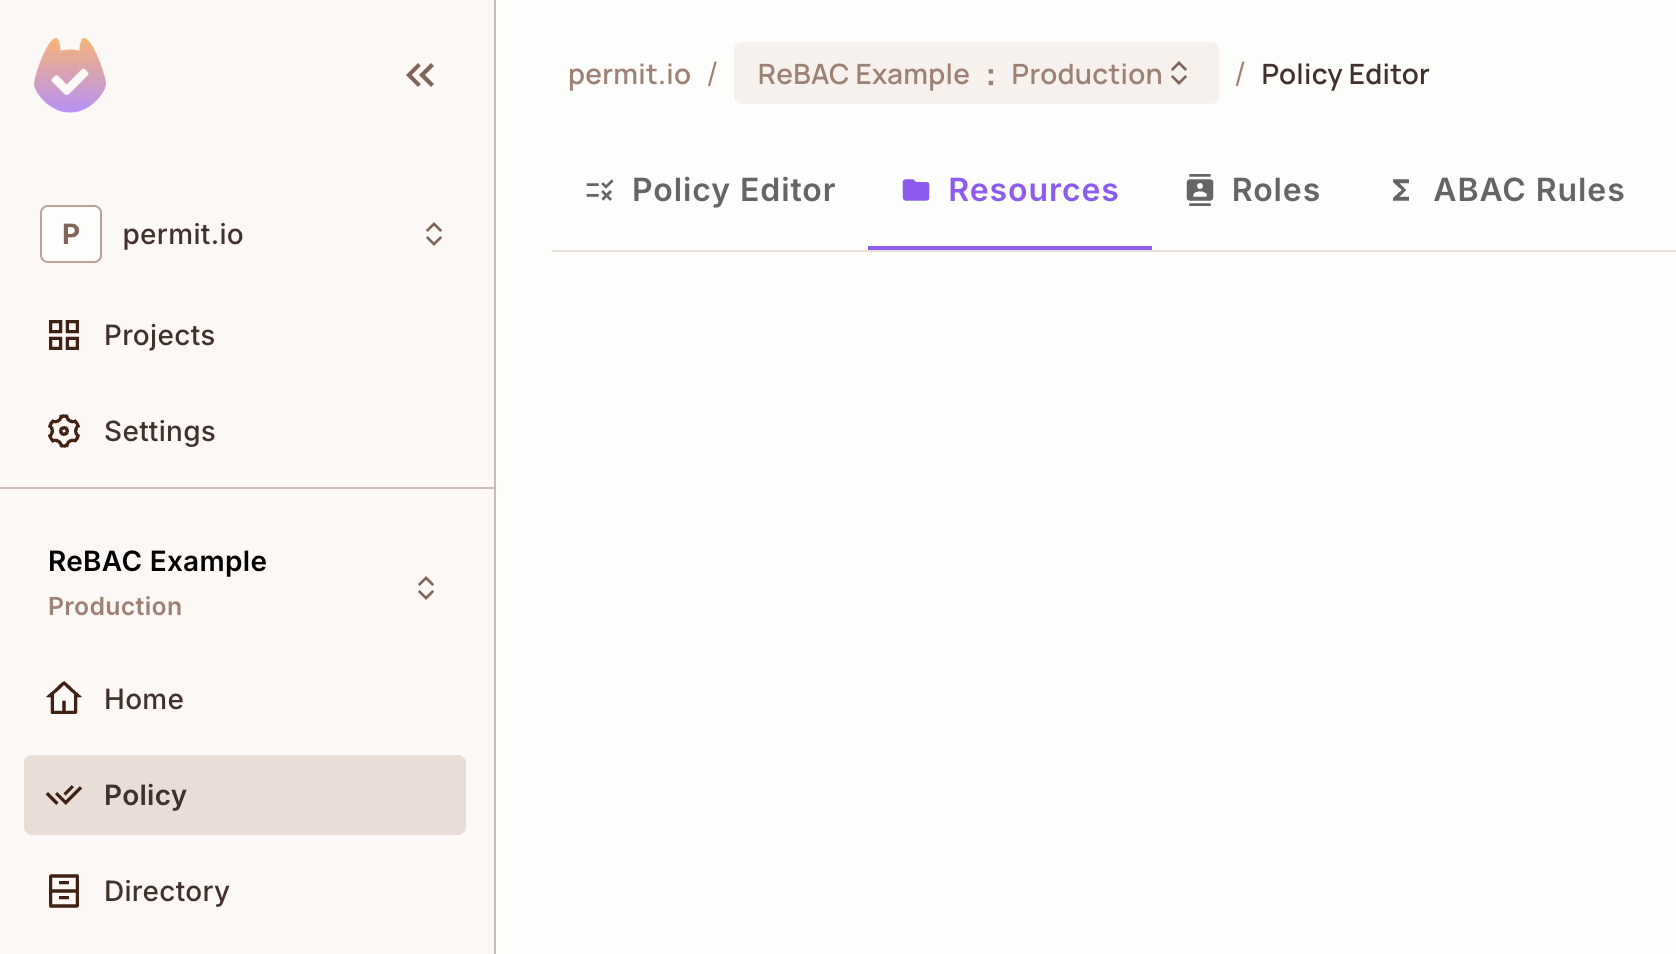
Creating the Dashboard Resource
Click on Add Resource and enter the following details for the new resource:
- Name:
Dashboard - Actions:
view,remove-widget,add-widget,edit,delete,create - Roles on resource:
Owner,Viewer,Analyst
Save the resource. Dashboard is now created, and it becomes the parent resource.
Creating the Widget Resource
Next, click Add Resource again and provide the following details:
- Name:
Widget - Actions:
view,edit,delete,create - Roles on resource:
Owner,Viewer,Editor
Save the resource. Widget is now created, and it becomes the child of Dashboard.
Resources Overview
You now have two resources in your ReBAC policy:
Dashboard, with its actions and roles.Widget, with its distinct set of actions and roles.
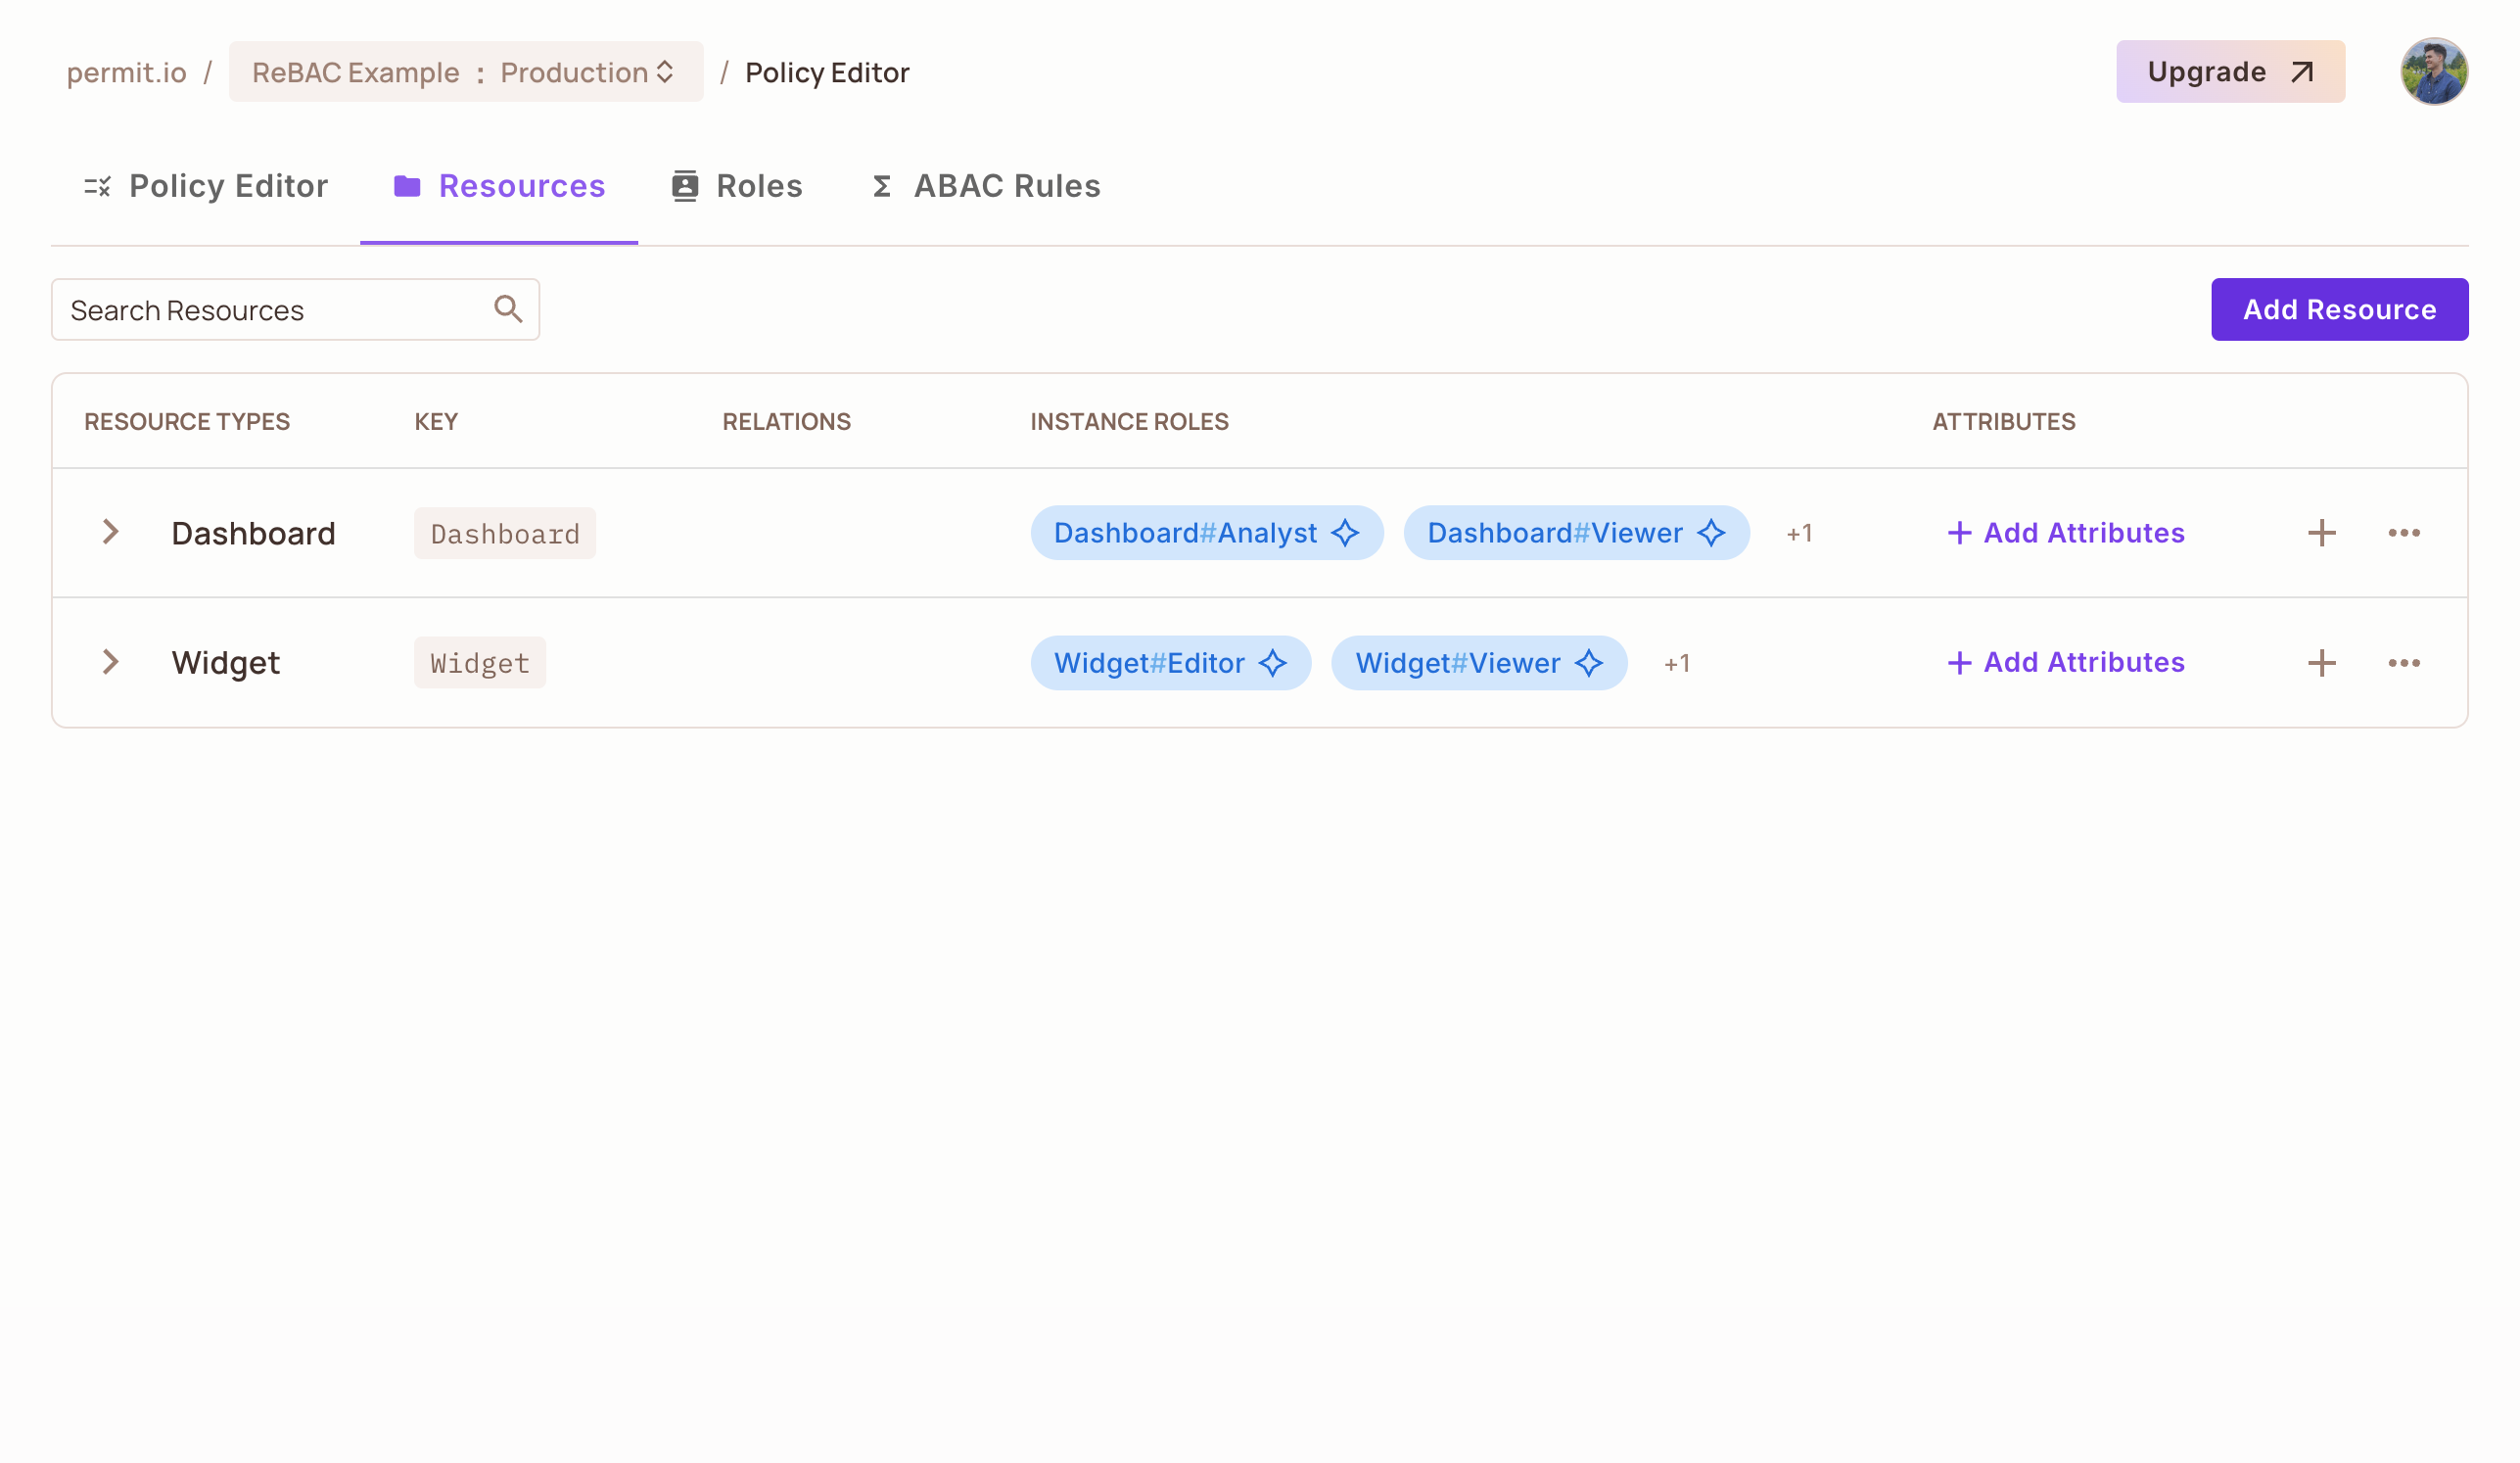
Step 2: Define resource relations
Next, configure the relation between the two resources.
Open the Resource Editor
In the Resources section, locate the Dashboard resource. Click the three-dot menu icon next to it and select Edit.
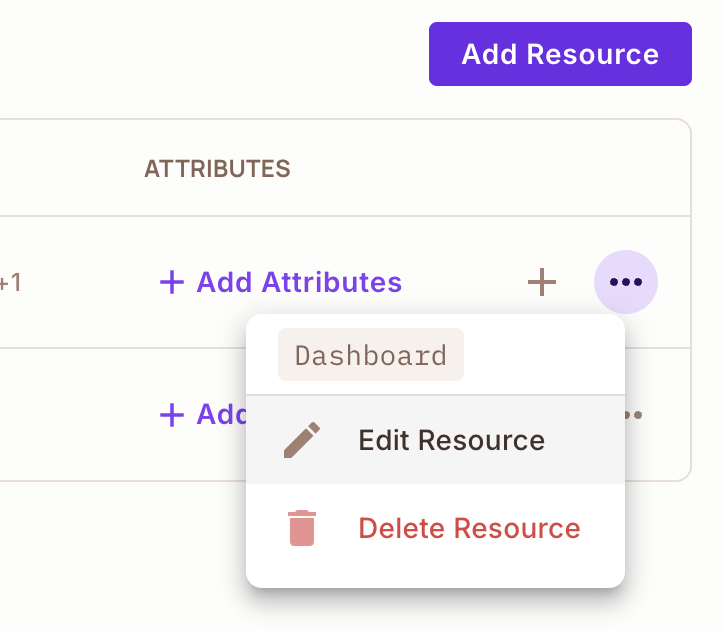
Define the Parent-Child Relation
Navigate to the Relations section of the resource editor. Configure the Dashboard resource as the parent of the Widget resource.
The Dashboard now acts as a container for its Widgets.
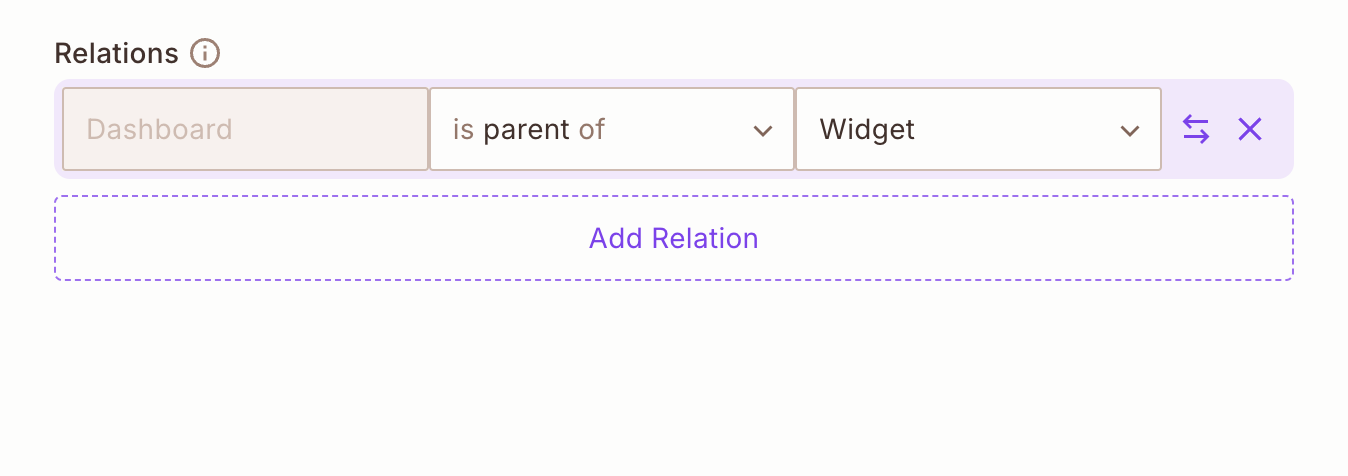
A resource cannot be its own parent. If a resource requires a self-relation, consider using an alternative relation type such as owner or container.
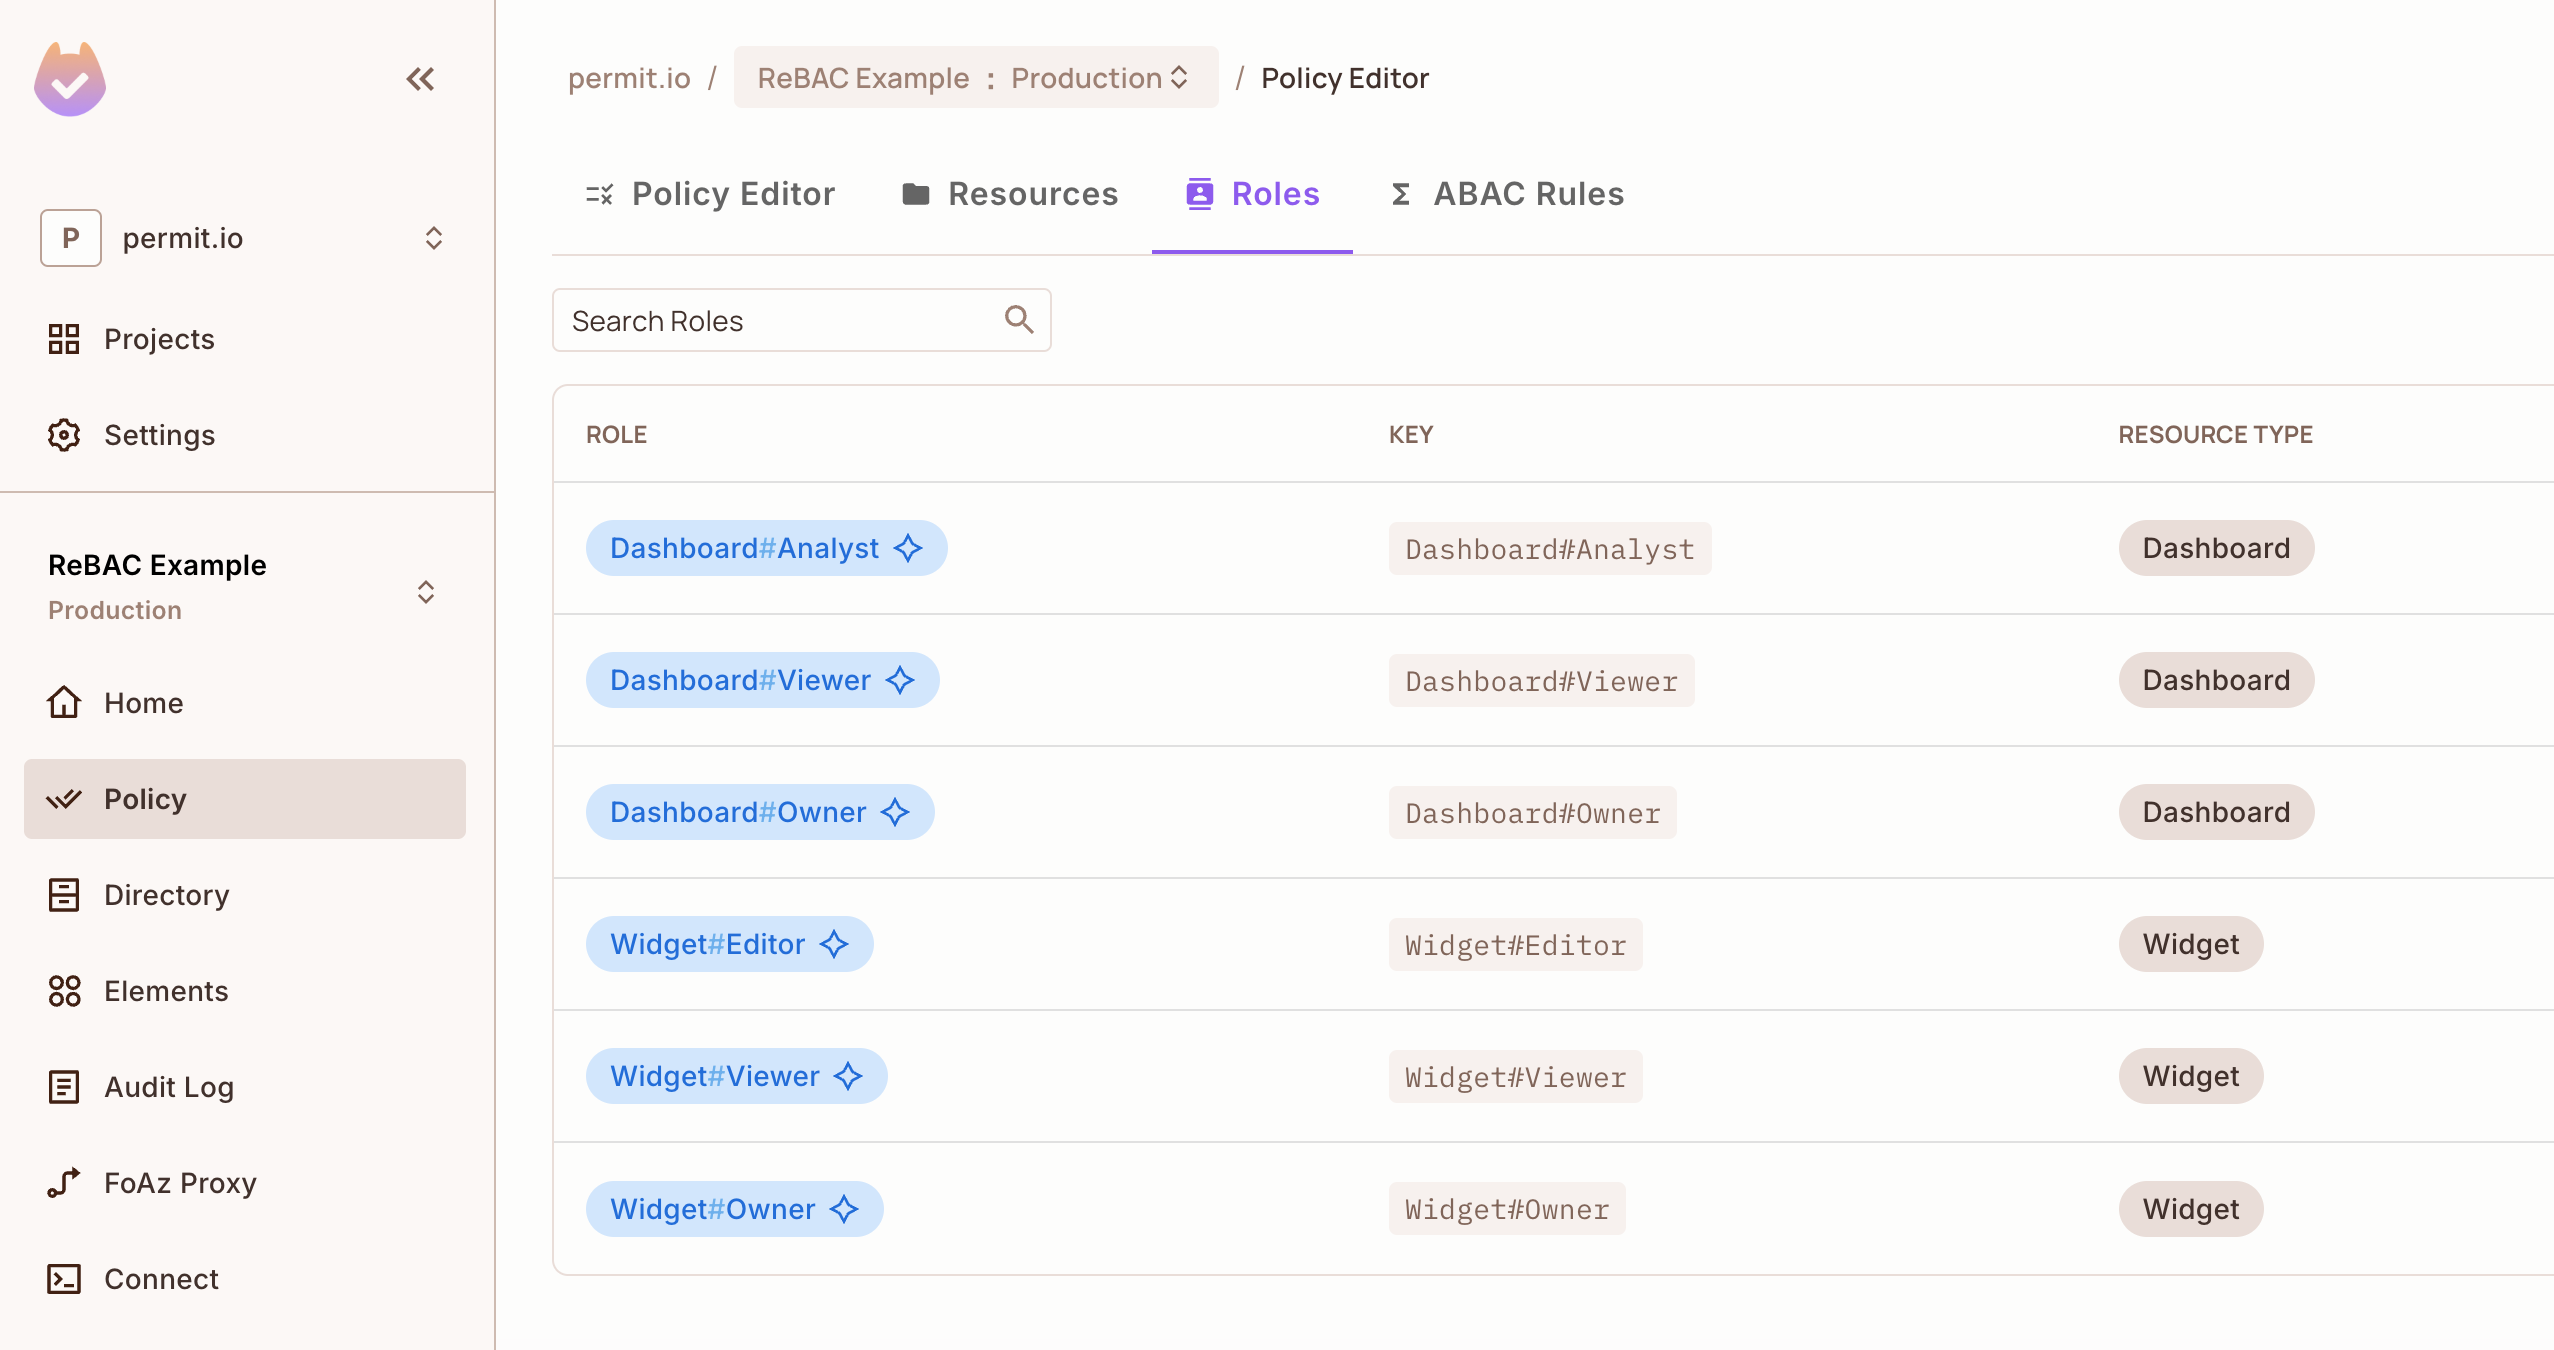
When you define the relation, Permit automatically creates the matching roles in the Policy Editor.
Save the Relation
Save the configuration. Dashboard is now the parent of Widget.
Step 3: Define role derivations
Configure the role derivations: rules that give a user a role on one resource because of their role on a related resource.
Navigate to the Resource's Role Derivation Settings
In the Permit dashboard, go to Policy > Roles. You see all Resource Roles there.
Define Role Derivation Logic
In the Role Derivation section, define how roles are inherited:
-
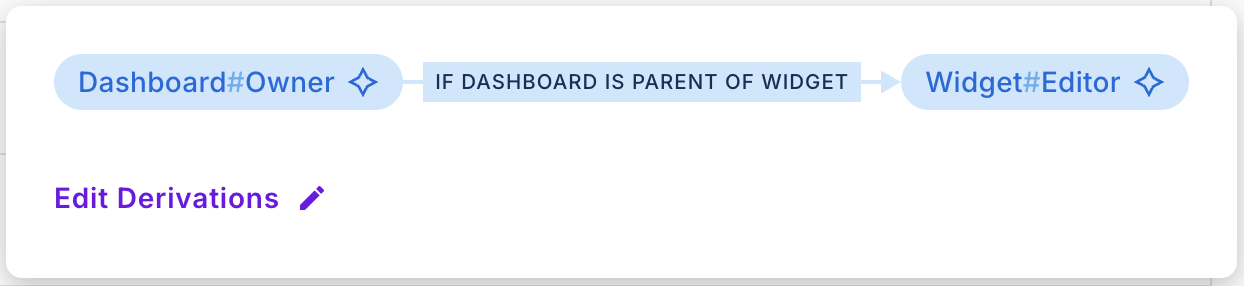
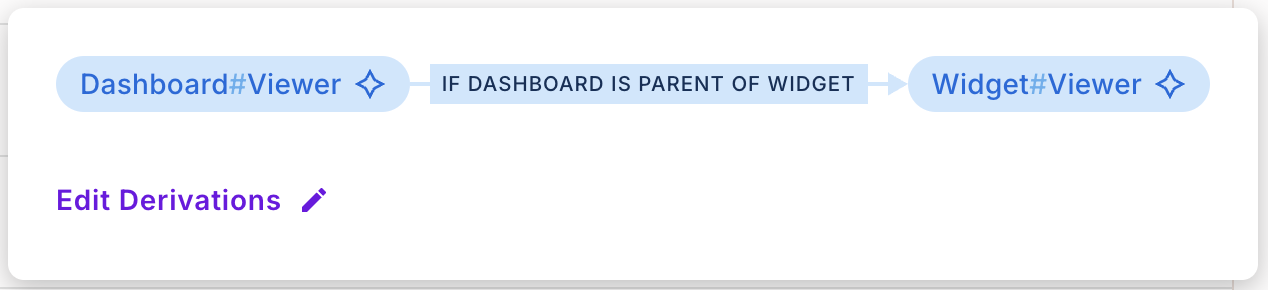
For the Widget resource, set rules that derive roles from its parent Dashboard resource. Example configurations:
-
If a user is assigned as an
Ownerof aDashboardinstance, they automatically become anEditorofall Widgetsunder that Dashboard. -
If a user is assigned as a
Viewerof aDashboardinstance, they automatically become theViewerofall Widgetsunder that Dashboard.
-
Step 4: Configure permissions
In Policy, assign the actions each role can perform on each resource.
For the Dashboard resource:
-
Owner: Can
view,create,edit,delete,add-widget, andremove-widget. -
Viewer: Can
viewonly. -
Analyst: Can
view,add-widget, andedit.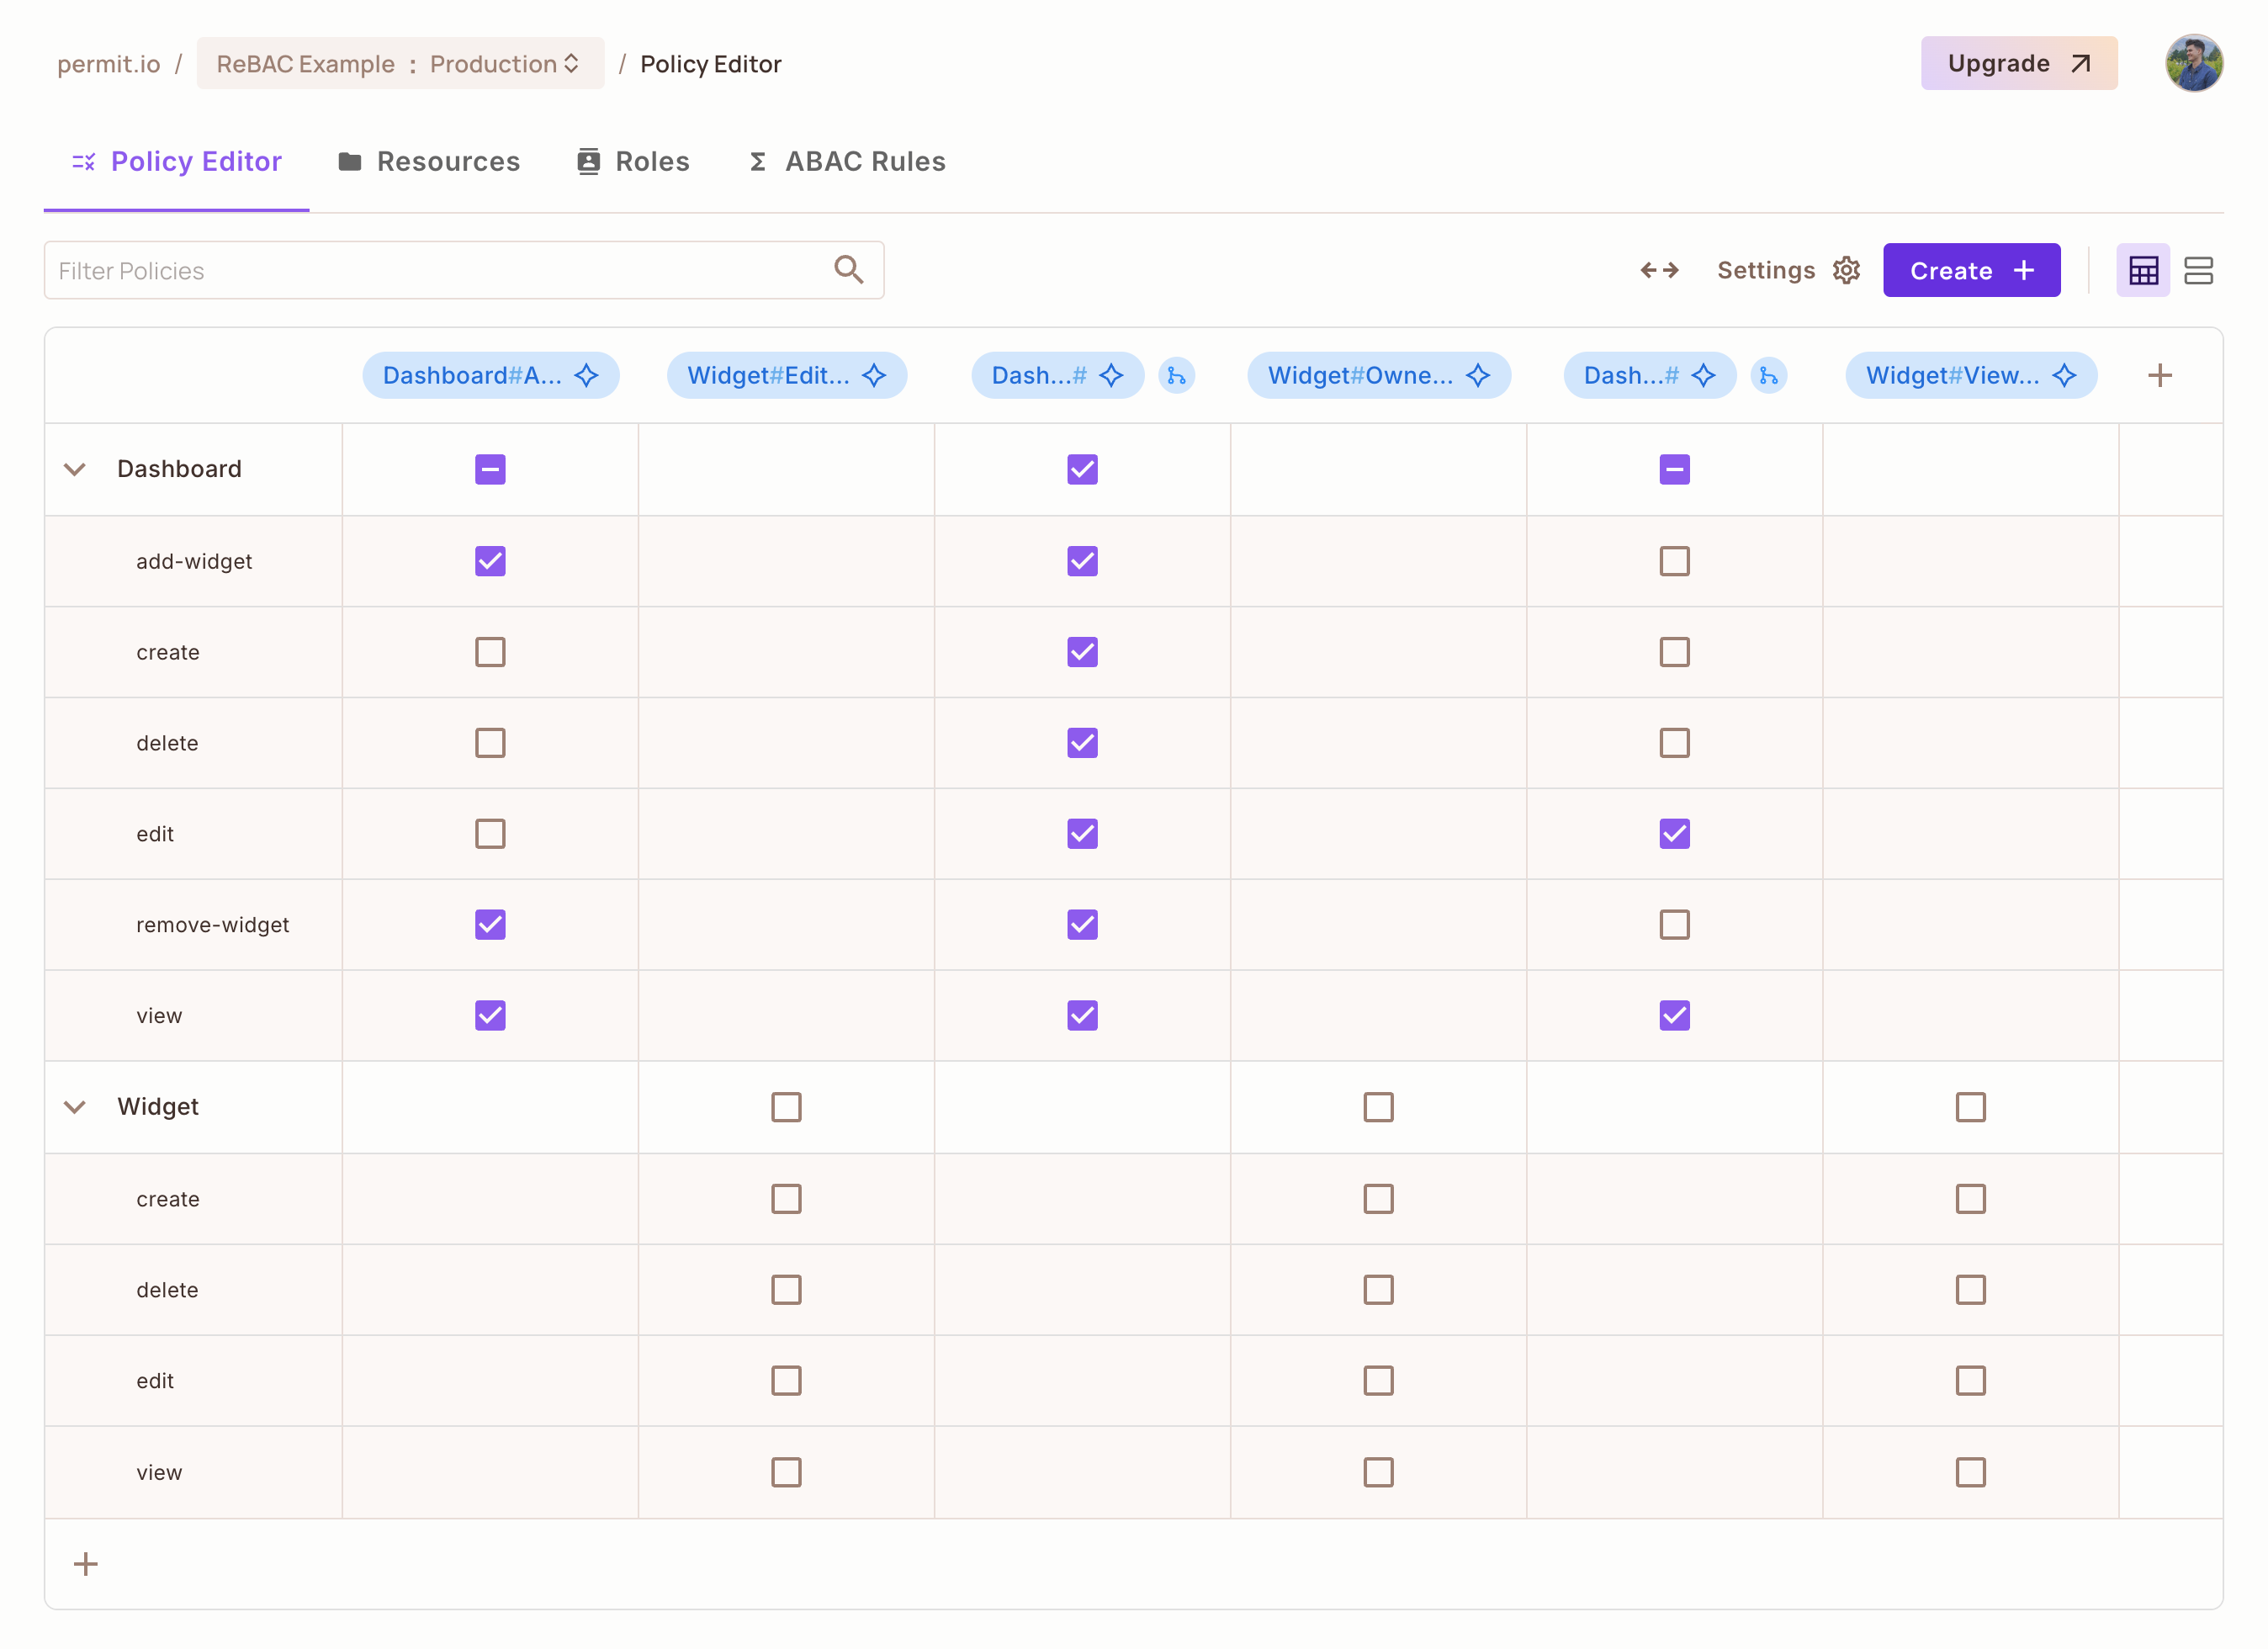
For the Widget resource:
-
Owner: Can
view,create,edit, anddelete. -
Viewer: Can only
view. -
Editor: Can
viewandedit.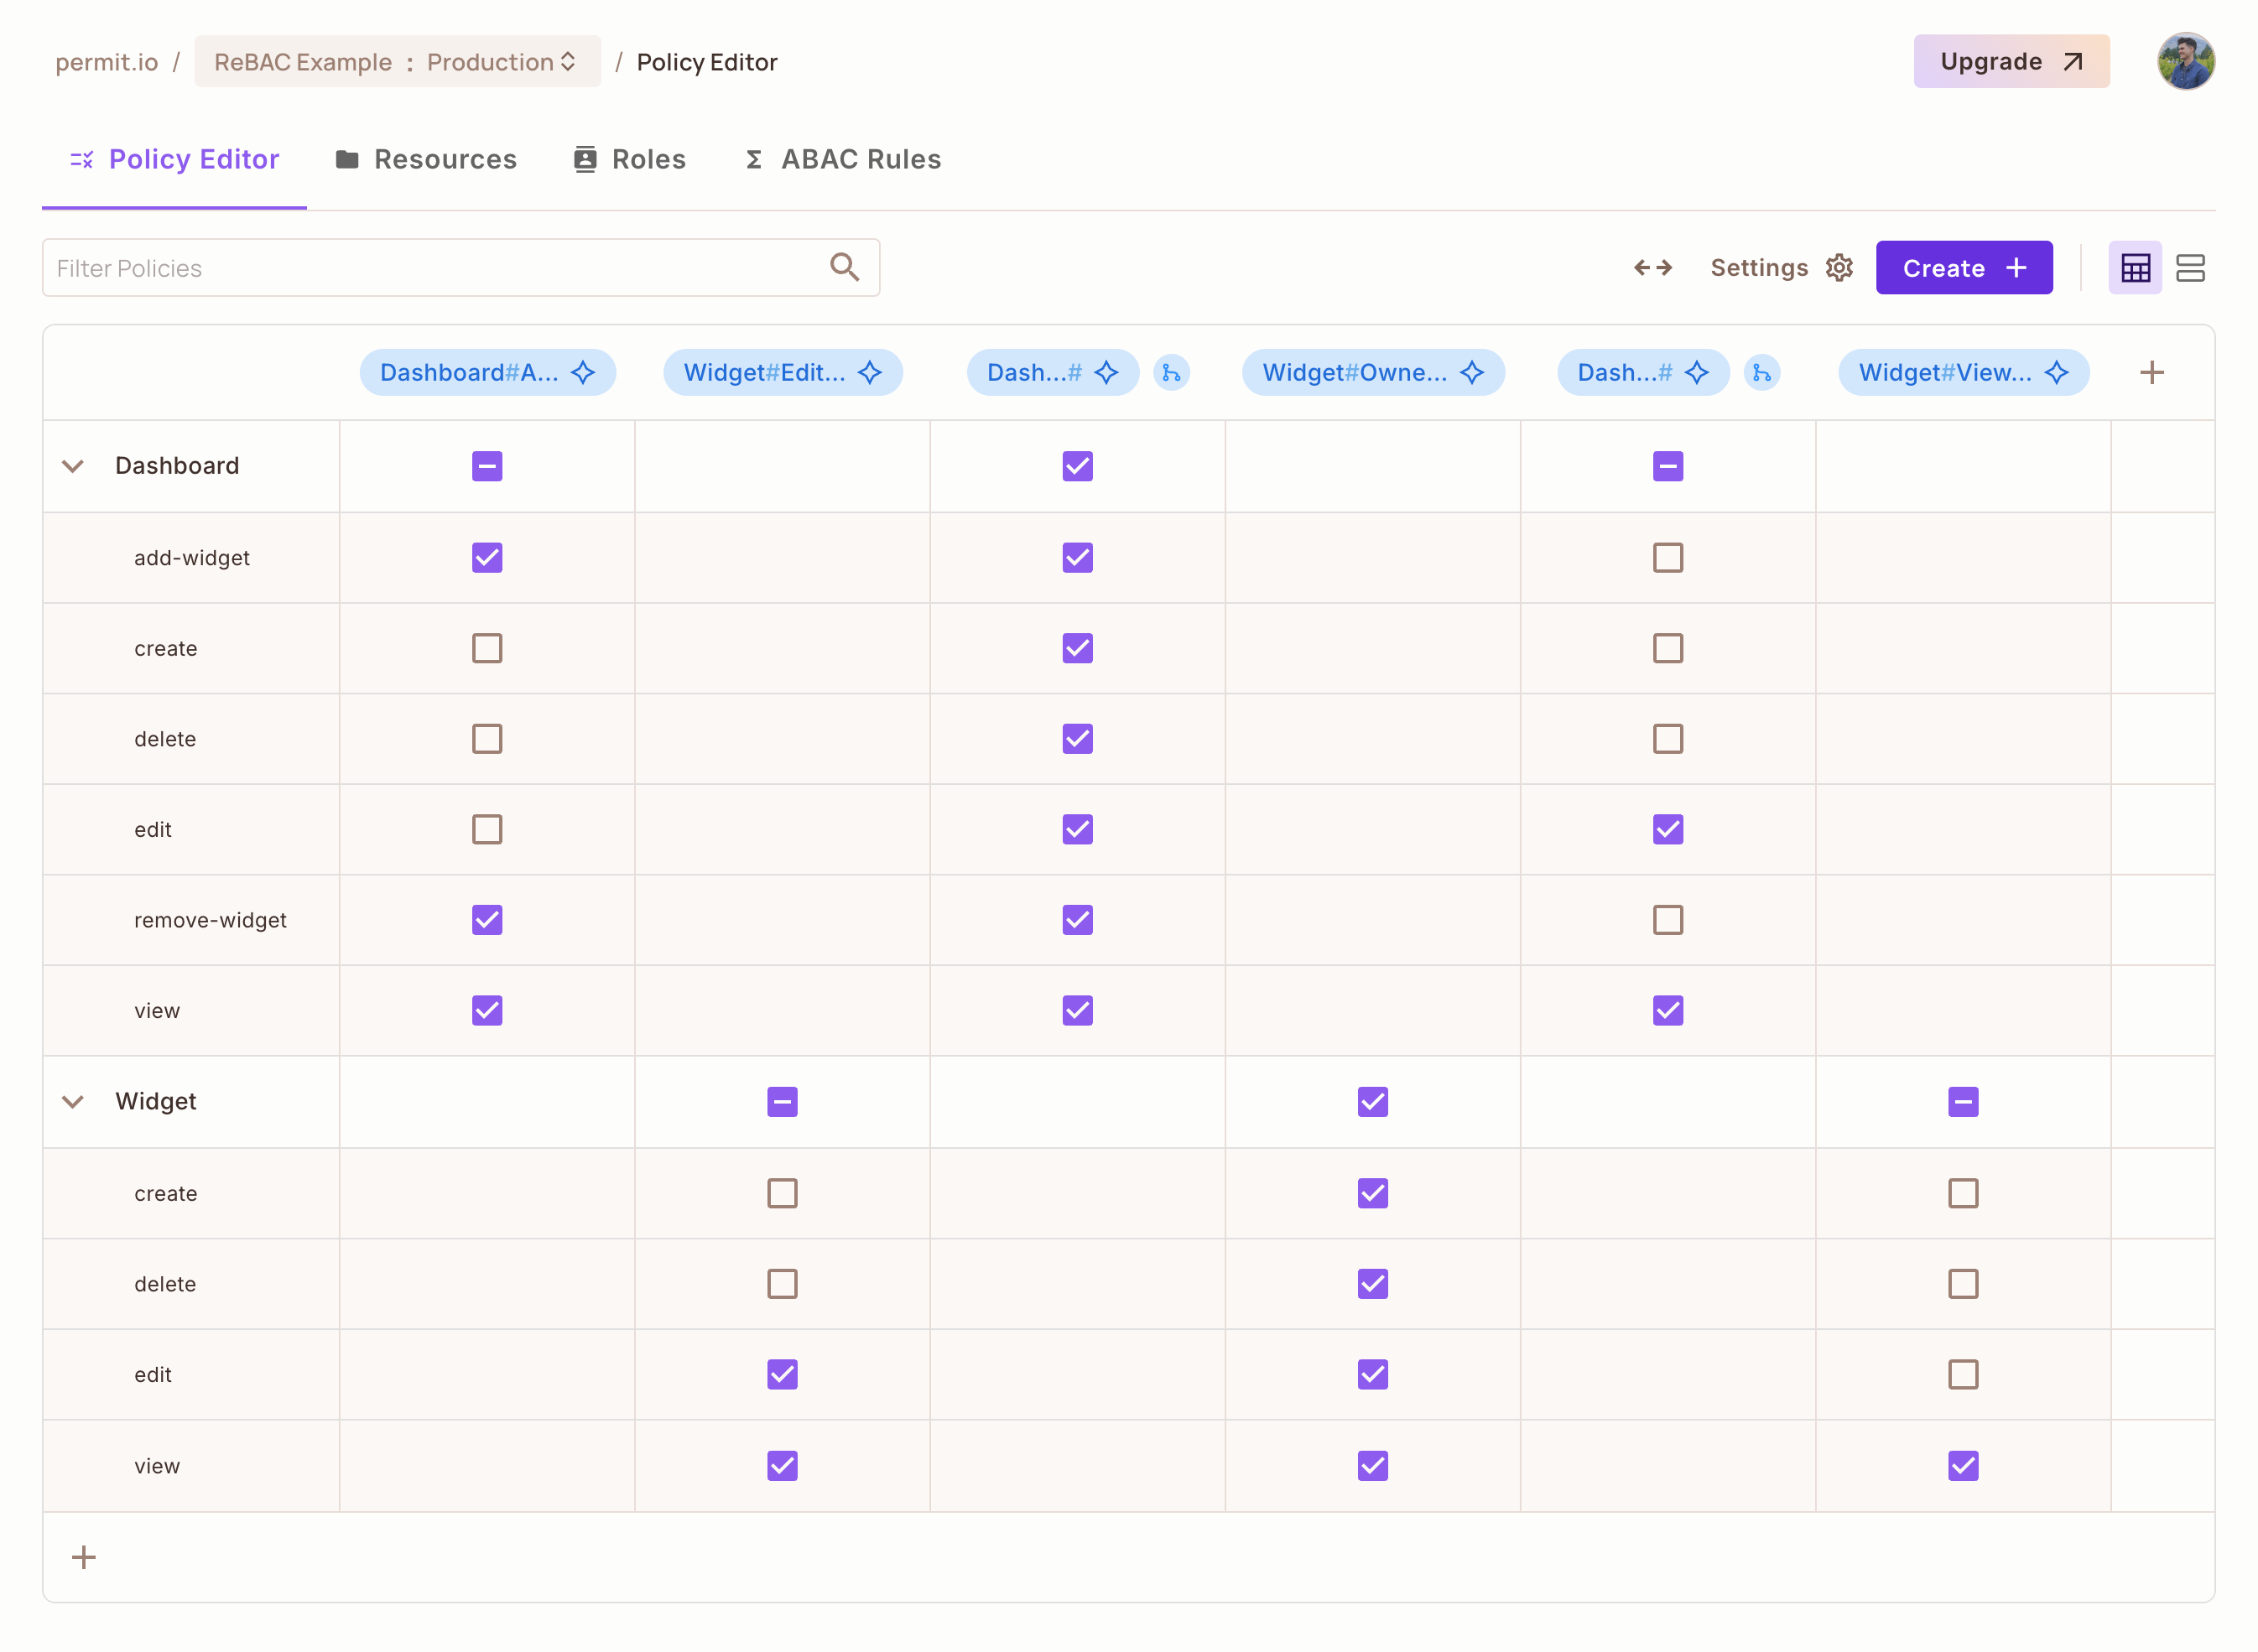
Save your permissions. Next, test the policy.
Defining our ReBAC Policy - Data
The schema is done. Now add the data the policy needs: users, resource instances, relationships, and role assignments.
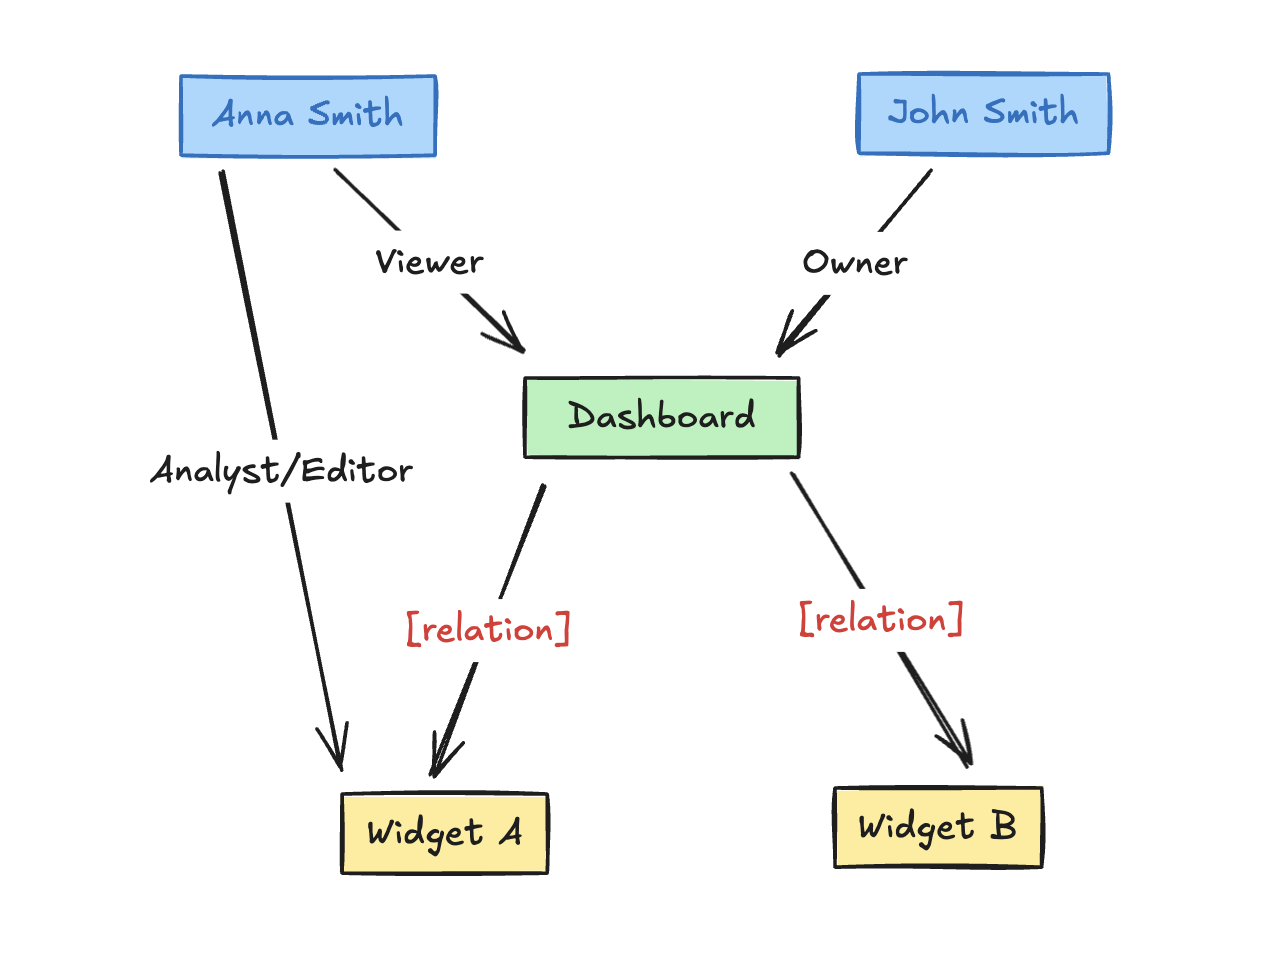
Step 1: Testing our Policy
Create Users
Create two test users:
John Smith- john@smith.comAnna Smith- anna@smith.com
Don't give them any top-level roles. You assign instance roles later, during testing.
Create Resource Instances and their Relationship-Tuples
Create an instance of the Widget resource called Data Consumption, under an instance of the Dashboard
resource called Data.
Navigate to Directory, click on Instances and click Add Resource Instance.
- Select the resource type as
Dashboard. - Pick your instance key unique identifier.
- Select the
defaulttenant. - Create your relationship. Select the
typefrom the dropdown list, and then fill in thesubjectandobjectinstance.
Dashboard Data is parent of Widget Data Consumption
Assign Roles
Assign an instance role to John Smith: make John the owner of the data_consumption widget.
- Navigate to
DirectoryandAdd Instance Roles. - Scroll down, and give the user permissions per resource instance.
Widget:data_consumption#Owner
Test the Policy
The ReBAC policy is fully configured. The last step is to test it.
await permit.check(userId, action, {
  type: "member_group",
  key: "someKey",
  tenant: "someTenant",
});
Pass these parameters to permit.check():
userId: The unique ID of the user.action: The action to perform (e.g., assigning a member to a group).member_group:${data}: The resource targeted, dynamically referencing the data instance.
Run the snippet against your PDP to check whether the user can perform the action.
What's next? 🎉
- Assign roles and permissions to users and tenants
- Define and sync resource instances with attributes
- Set up relationship tuples for dynamic access control
You are now a master of ReBAC!